Showing posts with label ORACLE. Show all posts

Friday, May 6, 2011

Convert Oracle Database from Enterprise Edition to Standard Edition

Selamat malam blogger,

Kali ini saya akan sedikit membagikan pengalaman dan sedikit pengetahuan mengenai Oracle database. Mungkin ga terlalu berguna dan membingungkan, tapi yah dinikmati saja, sapa tau suatu saat berguna hehe..

Let's begin !

Oracle database memiliki 5 edisi. Masing-masing edisi ini terdiri atas :

- Oracle Enterprise Edition:
Enterprise Edition adalah versi full dari Oracle Database Server, digunakan oleh perusahaan-perusahaan besar dengan kemampuan lebih dari 4 processor. Pilihan-pilihan seperti RAC, Partitioning, Spatial, dsb bisa dibeli terpisah untuk menunjang fungsionalitas database.

- Oracle Standard Edition:
Standard Edition digunakan oleh bisnis dan perusahaan dengan skala lebih kecil. Database options seperti Data Guard, Partitioning, Spatial, dsb. tidak available pada Standard Edition (mulai Oracle 10g RAC bisa digunakan dengan Standard Edition). Standard Edition hanya bisa digunakan pada server dengan maksimum 4 prosesor.

- Oracle Standard Edition One:
Standard Edition One adalah versi low cost, entry-level dari Oracle Standard Edition database server dimana hanya bisa digunakan pada server dengan maksimum 2 prosesor dan Windows platform.

- Oracle Personal Edition:
Personal Edition adalah single user version dari database server. Kurang lebih sama dengan Enterprise Edition, tapi tidak support advanced options seperti RAC, Streams, XMLDB, dsb.

- Oracle XE:
Express Edition (XE) adalah versi free Oracle database server. Oracle XE hanya bisa digunakan pada single processor. Hanya bisa menampung 4 GB data & 1 GB memory.

Untuk melihat perbedaan secara detil antara Enterprise, Standard dan Personal Edition pada Metalink :
-  Note 112591.1 Differences Between Enterprise, Standard and Personal Editions on Oracle 8.1
-  Note 161556.1 Differences between Oracle9i Personal, Standard and Enterprise on NT/2000
-  Note 269040.1 Differences Between Enterprise, Standard and Personal Editions on Oracle 9.2
-  Note 271886.1 Differences Between Different Editions of Oracle Database 10G
-  Note 465465.1 Differences Between Enterprise, Standard and Personal Editions on Oracle 10.2
-  Note 465460.1 Differences Between Enterprise, Standard and Personal Editions on Oracle 11.1

Jika sewaktu-waktu kita ingin merubah / upgrade / convert Oracle database Standard Edition ke Enterprise Edition, maka langkah-langkah yang dibutuhkan cukup mudah :
1.       1. Backup database, dapat menggunakan RMAN atau tar -cvf  pada folder /u01
2.       2. Shutdown database
3.       3. Uninstall SE software dengan masuk ke $ORACLE_HOME/oui/bin dan menjalankan runInstaller
4.       4. Pilih Deinstall Product. Kemudian centang semua dan tekan REMOVE.
5. Proses uninstall akan berjalan, tunggu hingga 100%. Walaupun diuninstall, folder oradata masih ada beserta datafile,redolog,controlfile-nya. Folder OracleHome masih ada tapi cuma ada folder ctx,dbs,lib dan log. Folder $ORACLE_BASE/admin masih ada beserta alert dan tracefilenya. Folder Flash_recovery_area masih ada beserta archivelognya. Folder OraInventory masih ada beserta isinya.
6.       6. Masuk ke CD Oracle dan jalankan runInstaller. Pilih Enterprise Edition. Jangan centang create database karena sudah ada. Sesuaikan dengan ORACLE_HOME yang sebelumnya. Akan muncul warning kalau ORACLE_HOME ini sudah ada isinya berupa file-file sisa remove Deinstall Product tadi, pilih YES untuk lanjut.
7 7  7. Proses install software akan berlanjut. Nanti kita diminta untuk menjalankan script sebagai user root. Sewaktu script berjalan, ketik ‘y’ untuk menkonfirmasi perubahan yang ada. Gunakan ORACLE_SID yang sudah ada sebelumnya.
8.       8. Startup database
9.       9. Masuk ke ?/rdbms/admin dan jalankan catalog.sql & catproc.sql scripts di sqlplus.
10.    10. Restart database dan pastikan versinya sudah berubah menjadi Enterprise Edition (EE).


Sekarang muncul pertanyaan : “Bagaimana dengan convert / downgrade dari Enterprise Edition ke Standard Edition ?” . Cukup mudah dan ini solusi yang sangat disarankan baik oleh Metalink maupun khalayak dunia DBA Oracle. Berikut adalah langkah-langkahnya :
1.       1. Backup database, dapat menggunakan RMAN atau tar -cvf  pada folder /u01
2.       2. Lakukan Export database yang akan diconvert  (Enterprise Edition)
3.    3. Uninstall software dan database Oracle yang Enterprise Edition. Masuk ke sqlplus dan ketik DROP DATABASE untuk menghapus database. Kemudian Uninstall EE software dengan masuk ke $ORACLE_HOME/oui/bin dan menjalankan runInstaller.
4.       4. Pilih Deinstall Product. Kemudian centang semua dan tekan REMOVE.
5.       5. Delete semua isi direktori /u01 maupun direktori yang berisi datafile Oracle.
6. Jalankan runInstaller dari CD Oracle. Install baru baik software dan database Oracle. Pilih Standard Edition (tidak ada cara lain). Samakan ORACLE_SID dan ORACLE_HOMEnya.
7 Startup database
8.       8. Masuk ke ?/rdbms/admin dan jalankan catalog.sql & catproc.sql scripts di sqlplus
9.       9. Import database dari hasil export sebelumnya.
 10  10. Drop cascade semua schema yang berkaitan dengan fitur Enterprise Edition seperti MDSYS
11.   11. Restart database dan pastikan data yang sebelumnya sama dengan di database yang baru ini.

Se      Semoga bermanfaat


Wednesday, December 30, 2009

Remote Display GUI pada Oracle di Mesin Linux

Tidak selamanya kita harus melakukan konfigurasi langsung pada mesin server/PC. Konfigurasi ini dapat dilakukan lewat jarak jauh (remote) melalui 2 metode yaitu metode console dan metode GUI. Untuk metode console, ada berbagai macam perangkat lunak yang dapat dipilih seperti PUTTY, SECURECRT dan XShell. Untuk metode GUI patut dicoba X-Manager. Biasanya sih saya suka pake yang Xmanager-Passive yang punyanya X-Manager.
Untuk Melakukan remote display GUI pada remote server :


1. Tambahkan IP dan hostname remote server di bagian /etc/hosts pada remote server dengan perintah vi
2. Jalankan perintah xhost + di console remote server
3. Jalankan Xmanager-Passive nanti dia akan muncul dan berada di tray icon (sudut kanan bawah).
4. Jalankan perintah EXPORT DISPLAY=IP-kita:0.0 untuk mengatur konfigurasi DISPLAY
5. Jalankan perintah xclock untuk mengecek apakah akses remote display sudah berhasil dilakukan. Jika berhasil maka akan muncul gambar jam digital GUI.

Selamat Mencoba..

Wednesday, December 23, 2009

ORA-32004: obsolete and/or deprecated parameter(s) specified

Untuk teman-teman yang sering menemukan pesan ORA-32004: obsolete and/or deprecated parameter(s) specified ketika startup database, kini ada jalan keluarnya. Error ini diakibatkan adanya beberapa parameter pada initialization parameter file yang sudah obsolete / tidak berlaku lagi di Oracle versi tertentu. Error seperti ini tidak berbahaya, namun agak mengganggu pemandangan saja hehe..

Jika ada yang pernah mengalami error seperti ini ketika melakukan startup database, maka lakukan langkah-langkah berikut :
1. buka sqlplus dan login sebagai SYS user
2. lihat parameter yang sudah obsolete di Oracle namun masih digunakan di initialization parameter file pada alert.log dengan text : “Deprecated system parameters with specified values: “biasanya setelah tulisan database startup).
3. Buang atau jadikan parameter yang sudah obsolete/deprecate sebagai comment dengan menggunakan tanda # atau dengan perintah alter system reset cpu_count scope=spfile sid='*'

(Untuk informasi parameter lain, bisa dilihat di http://www.lorentzcenter.nl/awcourse/oracle/server.920/a96530/changes.htm#638059)

ORA-00018: Maximum Number of Sessions Exceeded

Kali ini saya mau berbagi pengalaman ketika menemui salah satu error di Oracle yaitu ORA-00018: Maximum Number of Sessions Exceeded. Error ini biasanya didahului oleh error lain, dalam kasus ini ialah ORA-00604: error occurred at recursive SQL level 1. Error ini diakibatkan jumlah process yang disediakan oleh Oracle tidak dapat menampung banyaknya proses yang sedang berjalan serentak pada waktu tertentu. Salah satu solusi yang ditawarkan ialah meningkatkan jumlah process yang ada di initialization parameter Oracle.

Untuk melakukannya ikuti langkah-langkah berikut :
1. buka sqlplus dan login sebagai SYS user
2. lihat jumlah process yang disediakan Oracle dengan perintah : sho parameter PROCESSES
(Dalam kasus ini processes = 200)
3. Naikkan nilai processes sesuai dengan kebutuhan user/aplikasi pada saat itu dengan perintah :
Alter system set processes=400 scope=spfile;

Mengapa harus menggunakan scope=spfile dan bukan scope=both ? Karena parameter PROCESSES tidak bersifat dinamis namun membutuhkan restart database. Karenanya jika kita coba menggunakan scope=both maka akan menghasilkan pesan error seperti ini : ORA-02095: specified initialization parameter cannot be modified.

4. Shutdown database & startup kembali
5. Buat perubahan parameter ini menjadi permanen pada pfile dengan perintah : create pfile from spfile
6. Lakukan kembali shutdown database & startup kembali untuk memastikannya
7. Lihat nilai PROCESSES pada initialization parameter, seharusnya nilainya sudah menjadi 400. Perubahan pada nilai PROCESSES akan menaikkan nilai SESSIONS sekitar 10-13% dari nilai PROCESSES.

Wednesday, December 2, 2009

ORA-00600: [keltnfy-ldmInit], [46], [1]

Lately I'd just installed Oracle 10.2.0.1 in Red Hat Enterprice Linux 5.3. It run well until I changed the hostname of RHEL 5.3. I tried to change my hostname from localhost to r083rt. It changed successfully until that error appeared when I tried to connect to sqlplus.

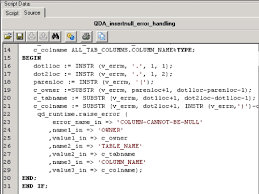
As usual I used sqlplus "/ as sysdba" snytax to get in there and just did 'startup'. Soon after that that error code appeared : ORA-00600: internal error code, arguments: [keltnfy-ldmInit], [46], [1], [], [], [], [], []. I thought this was a serious mode ON because ORA-00600 & ORA-07445 were internal errors and usually they need to be patched on better version.

I thought the problem began when I'd changed my hostname & the RHEL didn't recognize this new hostname. I searched fro more information & found this information :
In the error ldmInit indicates that the problem is related while getting host information of oracle during startup. The first argument 46 indicates the exception LDMERR_HOST_NOT_FOUND which is "gethostbyname system call fails". Oracle was unable to get host information from OS and bug fires.

To get out from this error, I just did these following steps :

Step 01: Check permission on /etc/hosts

$ ls -l /etc/hosts
-rw-r--r-- 1 root root 153 Nov 24 2007 /etc/hosts

Note that you need read permission of all users.

Step 02: Check the contents of /etc/hosts
Open the contents of /etc/hosts and check the contents inside it.
$ less /etc/hosts
Note that the contents of this files follow following format.

IP Address fully qualified hostname simple or short hostname Alias

A simple example,

$ cat /etc/hosts
# Do not remove the following line, or various programs
# that require network functionality will fail.
127.0.0.1 database localhost.localdomain localhost


Step 03: Check the hostname and make sure you can ping your hostname.
$ hostname
database


$ ping database
PING database (127.0.0.1) 56(84) bytes of data.
64 bytes from database (127.0.0.1): icmp_seq=0 ttl=64 time=0.057 ms
64 bytes from database (127.0.0.1): icmp_seq=1 ttl=64 time=0.050 ms
64 bytes from database (127.0.0.1): icmp_seq=2 ttl=64 time=0.041 ms


If you get the following message,
$ ping database
ping: unknown host database


then possibly you will hit above bug.
And you need to modify /etc/hosts files. In the alias section you can give the name of your machine name. If your machine name is "database" you can give /etc/hosts entry as,

127.0.0.1 database localhost.localdomain localhost

And then ping database again. Make sure you are able to ping your host.

Step 04: Diagnosis DNS problem if you have DNS setup
If you have DNS setup, ping is not a tool to diagnose DNS problem. A better tool to use is nslookup, dnsquery, or dig.

$nslookup www.google.com
The forward and reverse lookup should succeed.

Step 05: Check nsswitch.conf

$ cat /etc/nsswitch.conf
hosts: files dns


Make sure host lookup is also done through the /etc/hosts file and not just dns. The keyword files should come before dns.

Step 06: Check resolv.conf

$ cat /etc/resolv.conf
nameserver 4.2.2.2


Make sure nameserver with DNS name is added there.


After these steps were completed, I tried again to do startup database & guess : It's UP again..

Sunday, November 29, 2009

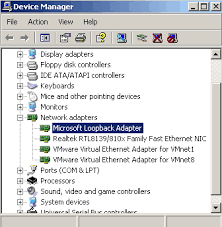
Cara menginstal adaptor Microsoft Loopback di Windows XP

Adaptor Microsoft Loopback merupakan alat uji untuk lingkungan jaringan virtual di mana akses jaringan tidak tersedia. Dan lagi, Anda harus menggunakan adaptor Loopback jika terdapat konflik dengan adaptor jaringan atau dengan driver adaptor jaringan. Anda bisa menyetujui klien jaringan, protokol, dan item konfigurasi jaringan lainnya untuk adaptor Loopback, dan Anda bisa menginstal driver adaptor jaringan atau adaptor jaringan yang lebih tinggi saat menyimpan informasi konfigurasi jaringan. Anda juga menginstal adaptor Loopback selama proses instalasi tanpa pengawasan.

Instalasi manual
Untuk menginstal secara manual adaptor Microsoft Loopback di Windows XP, ikuti langkah-langkah ini:
(Karena rata-rata Windows XP yang kita instal dalam bahasa inggris, maka step by step-nya juga disusun dengan bahasa inggris)
  1. From the Start menu, select Control Panel.

  2. Double-click Add Hardware to start the Add Hardware wizard.

  3. On the Welcome screen, click Next.

  4. On the Is the hardware connected? screen, select Yes, I have already connected the hardware, and click Next.

  5. On the The following hardware is already installed on your computer screen, select Add a new hardware device, and click Next.

  6. On the The wizard can help you install other hardware screen, select Install the hardware that I manually select from a list, and click Next.

  7. From the list, select the type of hardware you are installing screen, select Network adapters, and click Next.

  8. On the Select Network Adapter screen, make the following selections:

    • Manufacturer: select Microsoft.

    • Network Adapter: select Microsoft Loopback Adapter.

  9. Click Next.

  10. On the The wizard is ready to install your hardware screen, click Next.

  11. On the Completing the Add Hardware Wizard screen, click Finish.

  12. If you are using Windows 2003, restart your computer.

  13. Right-click My Network Places on the desktop and choose Properties. This displays the Network Connections control panel.

  14. Right-click the connection that was just created. This is usually named "Local Area Connection 2". Choose Properties.

  15. On the General tab, select Internet Protocol (TCP/IP), and click Properties.

  16. In the Properties dialog, do the following:

    1. IP Address: Enter a non-routable IP for the loopback adapter. Oracle recommends the following non-routable addresses:

      • 192.168.x.x (x is any value between 1 and 255)

      • 10.10.10.10

    2. Subnet mask: Enter 255.255.255.0.

    3. Leave all other fields empty.

    4. Click OK.

  17. Click OK.

  18. Click OK in the Local Area Connection 2 Properties dialog.

  19. Restart the computer.

  20. Add a line to the C:\windows\system32\drivers\etc\hosts file with the following format, after the localhost line:

    IP_address   hostname.domainname   hostname

    where:

    • IP_address is the non-routable IP address you entered in step 16.

    • hostname is the name of the computer.

    • domainname is the name of the domain.

    For example:

    10.10.10.10   mycomputer.mydomain.com   mycomputer
  21. Check the network configuration:

    1. Open System Properties, and select the Computer Name tab. In Full computer name, make sure you see the hostname and the domain name.

    2. Click Change. In Computer name, you should see the hostname, and in Full computer name, you should see the hostname and domain name.

    3. Click More. In Primary DNS suffix of this computer, you should see the domain name.


Catatan Secara default, properti TCP/IP dikonfigurasi untuk menggunakan DHCP.
Bagaimana mudah bukan ? Selamat mencoba

Tuesday, November 17, 2009

ORA-01031: insufficient privileges

Hello guys, I just want to share something I'd learned yesterday. I installed Oracle database 9i successfully. Everything just seemed to be normal before I found that I could not use this SQL syntax : sqlplus "/ as sysdba". When I tried it, error message occured, ORA-01031: insufficient privileges.


I try to connect with 'formal' mode :
sqlplus /nolog ;
conn sys/oracle as sysdba ;

Then it's connected. I'm in sys mode now. I can view all objects in sys schema. I got weird with this condition and started to check the causes. I checked whether "oradba" has been added to Windows Groups, but I could not find it. So I decided to add it on. After that I can login to sqlplus with SQL syntax : sqlplus "/ as sysdba" successfully.

To add ora_dba to Windows Groups :
1. Open Control Panel -> Administrative Tools -> Computer Management -> Local Users & Groups -> Groups
2. Right Click and choose New Group
3. Type ora_dba on Group Name. After that click Add button on bottom side and type your user name / login name to add to ora_dba group.
4. Click OK and then finished.
5. Just have a try in sqlplus "/ as sysdba"

Regards,


Robert
www.robert-halim.co.cc

Thursday, August 20, 2009

Oracle Critical Patch Updates and security Alerts

Buat yang suka baca blog gw, mungkin pada bingung yak kok tiba-tiba ada postingan tentang Oracle gitu... Hehe harap maklum aja ya soalnya emang bidang pekerjaannya di Oracle jadi harus sering-sering update info dan belajar bersama Oracle. Lagipula lumayan juga kan lewat aksi tanya jawab ini, kalian juga bisa belajar dikit-dikit tentang dunia Oracle hehe..Kali ini saya akan membahas tentang Oracle Critical Patch Updates and security Alerts. Apa itu Oracle Critical Patch Updates dan Security Alerts ? Yukz mari sama-sama kita bahas.

Oracle akhir-akhir ini mengeluarkan Critical Patch Update (CPU) yang baru tidak hanya untuk produk tertentu saja tapi untuk semua produk Oracle (tak terlepas apakah itu OAS, Collaboration Suite, Peoplesoft,dll)

Apa itu Critical Patch Updates (CPU) ?
CPU adalah semua masalah keamanan/bugs yang dikumpulkan bersama dan didistribusikan sebagai patch (penambal) setiap 3 bulan ( biasanya di Januari, April, JUly dan Oktober). Nah semua patch ini yang kita sebut CPU.

Trus apa dong itu Security Alerts ?
Security Alerts itu adalah sebutan Oracle untuk CPU sebelum tahun 2005 ( contohnya nih : Alert 21, dll)

Trus apa dong Masalah Keamanan / Bugs biasanya ?
Bermacam-macam sih, mulai dari akses yang tak bertanggungjawab ke aplikasi sampai penyerangan ke server sehingga user ga bisa akses applikasinya ( ini mirip DoS - Denial of Service)
Ehm mungkin saya kasih contoh aja kali ya supaya ada gambaran : Jadi kalo misalnya kita masuk ke aplikasi tanpa menggunakan hak akses yang seharusnya nah itu bisa terhitung sebagai masalah keamanan.

Dimana sih kita bisa dapetin Oracle Alerts dan CPU ?
Mudah saja, coba buka halaman http://www.oracle.com/technology/deploy/security/alerts.htm. Mungkin agak susah kalo kita baru baca pertama kali, tapi kalo uda sering baca (2-3x) lama2 juga mudeng / ngerti hehee..

Ok deh, sampai sini dulu pembahasan tentang Oracle. Semoga bermanfaat buat semuanya. Gb